🏢
Your company info
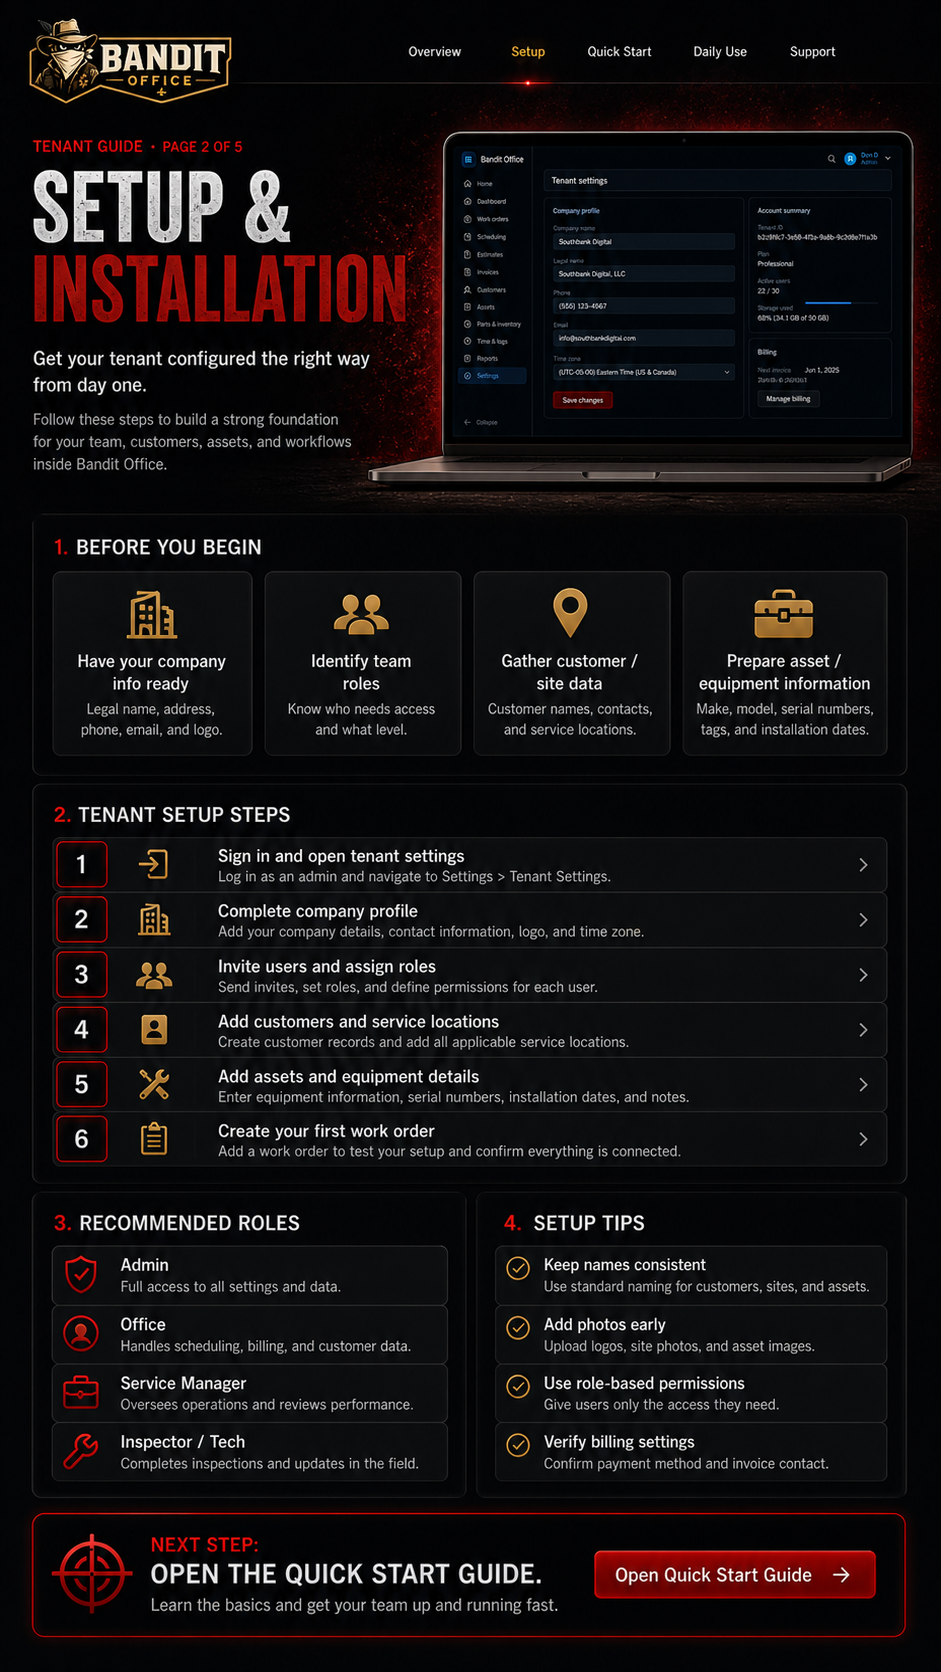
Legal name, display name, address, phone, email, logo, and timezone.
Configure your company workspace the right way before your team starts using it.
Your tenant is your private Bandit Office workspace. Set it up with your company profile, team roles, customers, sites, and first assets.
Legal name, display name, address, phone, email, logo, and timezone.
Decide who will be Admin, Office, Service Manager, and Inspector / Tech.
Gather customer names, contacts, service addresses, and site notes.
Prepare equipment names, serials, photos, locations, capacities, and notes.
Open Settings and enter your company name, contact details, logo, timezone, billing preferences, and default document settings. These settings make your documents and reports look like they belong to your company.
Create one customer record, then add at least one service location/site. Use clear names so your team can find the right location quickly from the office or field.
Add a real piece of equipment under the customer/site. Include a useful asset name, location, serial number, manufacturer details, and a clear photo whenever possible.
Create a test work order connected to the customer, site, and asset you just added. Assign it to a user, update the status, add a note, and mark it complete so your team understands the full flow.
Use the quick start checklist to confirm your workspace is ready for daily use.